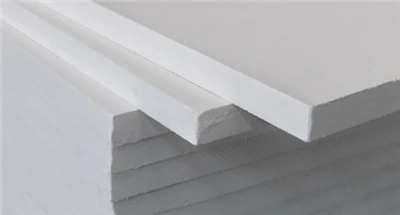
Achieving a flawless, level, and sag-free suspended ceiling depends heavily on correct installation procedures. Even the highest-grade mineral fiber board will fail if the suspension grid system is poorly balanced or installed under improper site conditions.
This guide outlines the professional technical steps for installing acoustic mineral fiber tiles into standard ceiling grid networks, serving as an excellent training resource for contractors and project managers.
Phase 1: Site Condition Prerequisites
Before opening your pallets of mineral fiber tiles, the building environment must meet specific interior construction codes:
Wet Trades Complete: All plastering, concrete pouring, and drywall mudding must be 100% dry.
HVAC Operational: The building's air conditioning and climate control systems should be operational for at least 24 hours to stabilize relative humidity.
Plenum Prepped: All electrical wiring, plumbing, and AC ducts above the ceiling line must be securely fastened and inspected.
Phase 2: Installing the Grid Framework
A stable framework ensures the mineral fiber ceiling boards sit perfectly flat without stress lines.
[Wall Angle] ──> [Main Tee (1200mm centers)] ──> [Cross Tees (600mm)] ──> [Lay-in Board]
Marking the Level: Use a laser level to snap a precise elevation line along all perimeter walls. Fix the steel Wall Angle firmly at 300mm intervals.
Hanging Main Tees: Suspension wires (minimum 12-gauge galvanized wire) must be attached to the structural soffit. Hang the Main Tees at 1200mm intervals, keeping them level with the wall angle.
Snapping Cross Tees: Interlock the 1200mm Cross Tees perpendicularly into the Main Tees at 600mm spacing. Follow with 600mm Cross Tees to form precise 600x600mm or 603x603mm modular square openings.
Phase 3: Handling and Laying the Board
Clean Hands: Installers must wear clean white cotton gloves to prevent oily fingerprints or dirt transfer onto the factory-painted white tile surface.
The In-and-Drop Method: Tilt the mineral fiber tile slightly, slide it up through the grid opening, and gently lower it until it rests evenly on the flanges of the T-bars.
Cutting Borders: For perimeter borders, measure the gap accurately. Cut the mineral fiber tile face-up using a sharp utility knife and a straight steel edge ruler. For Tegular edge tiles, use a rebate knife to recreate the drop shadow profile on the cut edge.
Pro-Tips for Field Success
Never Force a Tile: If a board does not drop smoothly into the grid, re-check the squareness of the T-bar framework. Forcing it will chip the delicate corners.
Arrow Alignment: Check the back of the tiles. Many manufacturers print direction arrows. Ensure all arrows point in the same direction during installation to guarantee a uniform surface texture appearance.