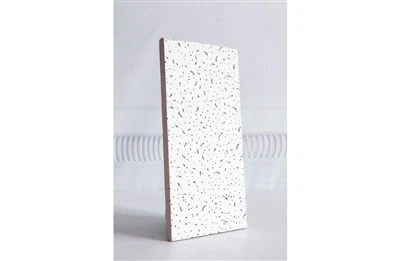
Can pinhole mineral fiber ceiling tiles be painted? That's a question I get asked a lot as a supplier of pinhole mineral fiber ceiling tiles. Well, the short answer is yes, they can be painted. But there are a few things you need to know before you pick up that paintbrush.
First off, let me give you a bit of background on pinhole mineral fiber ceiling tiles. These tiles are made from a combination of mineral fibers, binders, and other additives. They're known for their acoustic properties, which means they can help reduce noise in a room. They also come in a variety of styles and patterns, like the Square Colors Mineral Fiber Board and the Tegular Sand Hole Mineral Fiber Board. And of course, the pinhole design gives them a unique look that can add character to any space.
Now, why would you want to paint these tiles? There are a few reasons. Maybe you're redecorating and want to change the color of your ceiling to match a new color scheme. Or perhaps the tiles have started to look a bit dull or dirty over time, and a fresh coat of paint can give them a new lease on life. Whatever the reason, painting pinhole mineral fiber ceiling tiles can be a great way to update the look of a room without having to replace the entire ceiling.
But before you start painting, there are a few steps you need to take to ensure a successful paint job. The first step is to clean the tiles thoroughly. Use a mild detergent and water to remove any dirt, dust, or grease from the surface of the tiles. You can use a soft brush or a sponge to gently scrub the tiles, but be careful not to damage the pinhole design. Rinse the tiles well with clean water and let them dry completely before you start painting.
Next, you'll need to choose the right type of paint. For pinhole mineral fiber ceiling tiles, I recommend using a high-quality latex paint. Latex paint is easy to apply, dries quickly, and is durable. It also has good adhesion, which means it will stick to the surface of the tiles and won't peel or chip easily. You can choose a flat, eggshell, or satin finish, depending on the look you want to achieve. A flat finish will give the tiles a more matte look, while an eggshell or satin finish will give them a bit more sheen.
Before you start painting, it's a good idea to test the paint on a small, inconspicuous area of the tile to make sure it adheres properly and doesn't change the appearance of the pinhole design. Apply a thin coat of paint to the test area and let it dry completely. Check the test area to make sure the paint looks good and doesn't cause any problems. If everything looks okay, you can proceed with painting the rest of the tiles.
When it comes to applying the paint, there are a few different methods you can use. You can use a roller, a brush, or a sprayer. Each method has its own advantages and disadvantages, so it's up to you to choose the one that works best for you.
If you choose to use a roller, make sure you use a high-quality roller cover that is designed for use on textured surfaces. Start by cutting in around the edges of the tiles with a brush, and then use the roller to apply the paint to the rest of the surface. Roll the paint on in a smooth, even motion, and make sure you cover the entire surface of the tiles. Apply multiple thin coats of paint, rather than one thick coat, to ensure a smooth, even finish.
If you prefer to use a brush, choose a high-quality brush that is designed for use on ceilings. Use the brush to apply the paint in a smooth, even motion, and make sure you cover the entire surface of the tiles. Be careful not to leave any brush marks or drips. Like with a roller, apply multiple thin coats of paint for the best results.
Using a sprayer can be a great option if you have a large area to paint or if you want to achieve a more professional-looking finish. However, it's important to use a sprayer that is designed for use on ceilings and to follow the manufacturer's instructions carefully. When using a sprayer, make sure you protect the surrounding area from overspray by covering it with plastic sheeting or drop cloths. Apply the paint in a smooth, even motion, and make sure you cover the entire surface of the tiles. Again, apply multiple thin coats of paint for the best results.
One thing to keep in mind when painting pinhole mineral fiber ceiling tiles is that the paint may not completely fill in the pinholes. This is normal and actually adds to the unique look of the tiles. However, if you want to fill in the pinholes for a smoother finish, you can use a spackling compound or a joint compound to fill them in before you paint. Let the compound dry completely and then sand it smooth before applying the paint.
After you've finished painting the tiles, let them dry completely before you touch or move them. Depending on the type of paint you used and the humidity in the room, this may take anywhere from a few hours to a few days. Once the paint is dry, you can enjoy your newly painted ceiling.


In conclusion, pinhole mineral fiber ceiling tiles can definitely be painted, and it can be a great way to update the look of a room. Just make sure you follow the steps outlined above to ensure a successful paint job. If you have any questions or need more information, feel free to contact us. We're here to help you with all your pinhole mineral fiber ceiling tile needs. And if you're interested in purchasing our Mineral Fiber Ceiling Tiles, we'd love to have a chat with you about your requirements. Whether you're a contractor, a designer, or a homeowner, we can provide you with high-quality products and excellent customer service. So don't hesitate to reach out and start the conversation!
References:
- "Painting Mineral Fiber Ceiling Tiles." DIY Network.
- "How to Paint a Ceiling." This Old House.
- "Choosing the Right Paint for Your Ceiling." Sherwin-Williams.