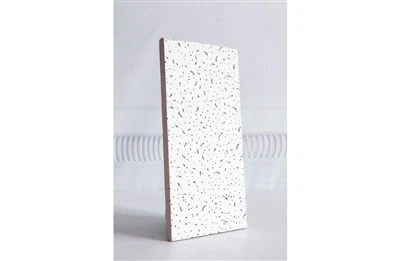
Do pinhole mineral fiber ceiling tiles require special tools for installation?
As a supplier of pinhole mineral fiber ceiling tiles, I often get asked about the installation process and whether special tools are necessary. In this blog post, I'll share some insights based on my experience in the industry and provide you with a clear understanding of what's involved in installing these ceiling tiles.
Pinhole mineral fiber ceiling tiles are a popular choice for many commercial and residential applications due to their aesthetic appeal, acoustic properties, and affordability. These tiles are made from mineral fibers that are compressed and formed into panels with a pinhole pattern on the surface. They are typically lightweight and easy to handle, making them a convenient option for ceiling installations.
When it comes to installation, the good news is that pinhole mineral fiber ceiling tiles generally do not require special tools. Most of the tools needed for installation are common household items or basic construction tools that you may already have on hand. Here are some of the essential tools you'll need for a successful installation:
- Measuring Tape: A measuring tape is essential for accurately measuring the dimensions of the ceiling area where the tiles will be installed. This will help you determine the number of tiles needed and ensure a proper fit.
- Utility Knife: A utility knife is used to cut the ceiling tiles to the appropriate size. Make sure to use a sharp blade to ensure clean and precise cuts.
- T-Square or Straight Edge: A T-square or straight edge is used to guide the utility knife when cutting the tiles. This will help you make straight and accurate cuts.
- Staple Gun or Nail Gun: A staple gun or nail gun is used to secure the ceiling tiles to the ceiling grid or furring strips. Make sure to use the appropriate type and size of staples or nails for the job.
- Ceiling Grid or Furring Strips: The ceiling grid or furring strips provide a framework for the ceiling tiles to be installed on. Make sure to choose a grid or furring strips that are compatible with the size and weight of the ceiling tiles.
- Safety Equipment: Safety should always be a top priority when working on any construction project. Make sure to wear safety glasses, gloves, and a dust mask to protect yourself from debris and dust.
In addition to these basic tools, you may also need some additional tools depending on the specific installation requirements. For example, if you are installing the ceiling tiles on a curved ceiling, you may need a flexible cutting tool or a heat gun to bend the tiles to the desired shape. If you are installing the ceiling tiles in a high-traffic area, you may need to use a stronger adhesive or a mechanical fastener to ensure a secure installation.


Now that you know what tools are needed for installation, let's take a look at the installation process itself. The installation process for pinhole mineral fiber ceiling tiles typically involves the following steps:
- Prepare the Ceiling: Before installing the ceiling tiles, make sure the ceiling surface is clean, dry, and free of any debris or obstacles. If necessary, repair any damage to the ceiling surface and ensure it is level.
- Install the Ceiling Grid or Furring Strips: If you are using a ceiling grid, install it according to the manufacturer's instructions. If you are using furring strips, attach them to the ceiling surface using screws or nails. Make sure the grid or furring strips are level and properly spaced.
- Measure and Cut the Tiles: Measure the dimensions of the ceiling area and cut the ceiling tiles to the appropriate size using a utility knife and a T-square or straight edge. Make sure to leave a small gap between the tiles and the walls or other obstacles to allow for expansion and contraction.
- Install the Tiles: Starting from one corner of the ceiling, place the first tile on the ceiling grid or furring strips and secure it using a staple gun or nail gun. Make sure the tile is level and properly aligned with the adjacent tiles. Continue installing the tiles in rows, making sure to stagger the joints between the tiles for a more aesthetically pleasing look.
- Finish the Installation: Once all the tiles are installed, trim any excess material from the edges of the tiles using a utility knife. If necessary, apply a sealant or caulk to the joints between the tiles to prevent air and moisture from entering.
As you can see, the installation process for pinhole mineral fiber ceiling tiles is relatively straightforward and does not require any special skills or tools. However, it is important to follow the manufacturer's instructions and take the necessary safety precautions to ensure a successful installation.
In conclusion, pinhole mineral fiber ceiling tiles do not require special tools for installation. Most of the tools needed for installation are common household items or basic construction tools that you may already have on hand. By following the installation process outlined above and using the appropriate tools and materials, you can easily install pinhole mineral fiber ceiling tiles in your home or commercial space.
If you are interested in purchasing pinhole mineral fiber ceiling tiles or have any questions about the installation process, please feel free to [contact us for a purchase consultation]. We are a leading supplier of Mineral Fiber Board, Mineral Fiber Board, Mineral Wool Ceiling Tiles, and Tegular Pinhole Mineral Fiber Board, and we would be happy to assist you with your project.
References
- Manufacturer's installation guides for pinhole mineral fiber ceiling tiles.
- Construction industry best practices for ceiling tile installation.