Hey there! I'm a supplier of ceiling T grids, and I often get asked about how to install these grids around obstacles. It can be a bit tricky, but with the right approach, you can achieve a professional-looking ceiling installation even in challenging spaces. In this blog post, I'll share some tips and tricks on how to install a ceiling T grid around obstacles, based on my experience in the industry.
First off, let's talk about the types of ceiling T grids we offer. We have a variety of options, including the 3D T Grid, the CEILING TEE GRID, and the Fut T Grid. Each type has its own unique features and benefits, so you can choose the one that best suits your needs and preferences.
Now, let's get into the installation process. The first step is to measure the area where you'll be installing the ceiling T grid. This includes measuring the length and width of the room, as well as the height from the floor to the ceiling. You'll also need to measure the location and size of any obstacles, such as pipes, ducts, or light fixtures. This information will help you determine how much material you'll need and how to cut the T grid to fit around the obstacles.
Once you have your measurements, it's time to plan the layout of the ceiling T grid. Start by marking the center of the room on the ceiling. This will be your starting point for installing the main runners. The main runners are the horizontal pieces of the T grid that run the length of the room. Use a chalk line or a laser level to mark a straight line along the ceiling where the main runners will be installed.


Next, install the main runners. Start by attaching the end clips to the walls at each end of the room. The end clips are used to hold the main runners in place. Then, slide the main runners into the end clips and secure them with screws or nails. Make sure the main runners are level and straight. You can use a level to check the alignment.
After the main runners are installed, it's time to install the cross tees. The cross tees are the vertical pieces of the T grid that connect the main runners. Start by measuring the distance between the main runners at each end of the room. This will help you determine the length of the cross tees. Cut the cross tees to the appropriate length using a hacksaw or a miter saw.
Once the cross tees are cut, install them between the main runners. Start at one end of the room and work your way across. Slide the cross tees into the slots on the main runners and secure them with clips or screws. Make sure the cross tees are level and straight. You can use a level to check the alignment.
Now, let's talk about how to install the ceiling T grid around obstacles. The key is to plan ahead and make precise cuts. Start by measuring the size and location of the obstacle. Then, use a template or a piece of cardboard to trace the shape of the obstacle onto the T grid. Cut the T grid along the traced line using a hacksaw or a miter saw. Make sure the cut is clean and precise.
Once the T grid is cut to fit around the obstacle, install it in place. You may need to use additional clips or screws to secure the T grid around the obstacle. Make sure the T grid is level and straight. You can use a level to check the alignment.
If you're installing the ceiling T grid around a pipe or a duct, you may need to use a special type of T grid called a "flex tee." Flex tees are designed to bend and curve around obstacles. They're made of a flexible material that can be easily shaped to fit the contours of the pipe or duct. To install a flex tee, simply bend it around the obstacle and secure it in place with clips or screws.
Another option for installing the ceiling T grid around an obstacle is to use a "cutout tee." Cutout tees are pre-cut to fit around specific types of obstacles, such as light fixtures or vents. They're available in a variety of sizes and shapes. To install a cutout tee, simply place it over the obstacle and secure it in place with clips or screws.
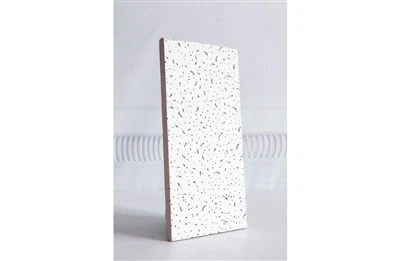
Once the ceiling T grid is installed around the obstacles, it's time to install the ceiling tiles. Ceiling tiles come in a variety of materials, including acoustic tiles, mineral fiber tiles, and metal tiles. Choose the type of ceiling tile that best suits your needs and preferences.
To install the ceiling tiles, start by placing them in the grid. Make sure the tiles are aligned with the T grid and that they fit snugly together. You can use a tile cutter or a utility knife to cut the tiles to fit around the edges of the room or around any obstacles.
After the ceiling tiles are installed, it's time to finish the installation. This includes trimming any excess material from the edges of the T grid and cleaning up the work area. You may also want to add some finishing touches, such as molding or trim, to give the ceiling a more professional look.
In conclusion, installing a ceiling T grid around obstacles can be a challenging but rewarding project. By following these tips and tricks, you can achieve a professional-looking ceiling installation even in challenging spaces. Remember to measure carefully, plan the layout, and make precise cuts. And if you have any questions or need help, don't hesitate to contact us. We're here to help you with all your ceiling T grid needs.
If you're interested in purchasing ceiling T grids for your project, please feel free to reach out to us. We offer a wide range of high-quality ceiling T grids at competitive prices. Our team of experts can help you choose the right product for your needs and provide you with installation support. Contact us today to start your ceiling installation project!
References:
- Personal experience as a ceiling T grid supplier.
- Industry knowledge and best practices for ceiling installation.