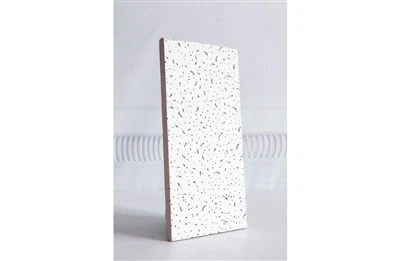
Hey there! As a supplier of Square Colors Mineral Fiber Boards, I've seen firsthand how a seamless installation can transform a space. In this blog, I'll share some tips and tricks to ensure your installation goes smoothly.
Pre - installation Preparation
Before you even start the installation process, it's crucial to do some groundwork. First off, measure the area where you'll be installing the boards. This might seem like a no - brainer, but accurate measurements are the foundation of a successful installation. You don't want to end up with gaps or have to cut too many boards, which can be a hassle.
Next, make sure the surface where the boards will be installed is clean and dry. Any dirt, dust, or moisture can affect the adhesion of the boards and lead to problems down the line. If there are any bumps or uneven areas, you might need to sand them down or use a leveling compound.
It's also a good idea to check the boards for any damage before you start. Look for cracks, chips, or warping. If you find any damaged boards, set them aside and contact your supplier (that's me!) to get replacements.
Tools You'll Need
Having the right tools is essential for a seamless installation. Here's a list of the basic tools you'll need:
- A measuring tape: For accurate measurements, as I mentioned earlier.
- A utility knife: To cut the boards to the right size. Make sure the blade is sharp to get clean cuts.
- A straight edge: This helps you make straight cuts with the utility knife.
- A staple gun or adhesive: Depending on the installation method, you'll need either a staple gun to secure the boards or an adhesive to stick them to the surface.
- A ladder: To reach the ceiling or high - up areas where you're installing the boards.
Installation Methods
There are a few different ways to install Square Colors Mineral Fiber Boards, and the method you choose depends on the surface and your personal preference.
Direct Adhesion
This method is great for smooth, flat surfaces. First, apply the adhesive evenly on the back of the board using a trowel. Make sure to cover the entire surface, but don't use too much adhesive as it can squeeze out and make a mess. Then, press the board firmly onto the surface, starting from one corner and working your way across. Use a roller to ensure good contact between the board and the surface.


Suspended Ceiling Installation
If you're installing the boards in a suspended ceiling system, you'll need a grid system. First, install the main runners and cross - tees to create the grid. Then, place the boards into the grid cells. Make sure the boards fit snugly and are level. You can use clips or brackets to secure the boards in place if needed.
Cutting the Boards
In most cases, you'll need to cut the boards to fit the space. When cutting, measure twice and cut once. Mark the cutting line on the board using a pencil and a straight edge. Then, use a utility knife to score the board along the line. Make a few passes with the knife to cut through the board completely.
If you need to cut curves or irregular shapes, you can use a jigsaw. Just make sure to use a fine - tooth blade to get a smooth cut.
Dealing with Corners and Edges
Corners and edges can be a bit tricky, but with a little practice, you can get them looking great. For inside corners, cut the boards at a 45 - degree angle and join them together. This creates a clean, seamless look. For outside corners, you can use corner trims or moldings to cover the edges and give a finished appearance.
Safety First
Installation can be a bit dangerous, so always prioritize safety. Wear safety goggles to protect your eyes from dust and debris. If you're using a ladder, make sure it's stable and on a level surface. And if you're using power tools, follow the manufacturer's instructions carefully.
After - installation Care
Once the installation is complete, clean up any dust or debris from the area. You can use a vacuum cleaner or a damp cloth to wipe down the boards. Avoid using abrasive cleaners as they can damage the surface of the boards.
Related Products
If you're interested in other types of mineral fiber boards, we also offer Tegular Pinhole Mineral Fiber Board and Mineral Fiber Board. These products have their own unique features and can be a great addition to your project. You can also check out our Mineral Fiber Ceiling Tiles/Board for more options.
Conclusion
Installing Square Colors Mineral Fiber Boards doesn't have to be a headache. By following these tips, doing proper preparation, using the right tools, and choosing the right installation method, you can ensure a seamless installation. If you have any questions or need more advice, don't hesitate to reach out. Whether you're a DIY enthusiast or a professional contractor, I'm here to help you make your project a success.
If you're interested in purchasing Square Colors Mineral Fiber Boards or any of our other products, feel free to contact me for a quote and to discuss your specific needs. Let's work together to create a beautiful and functional space!
References
- General construction knowledge and experience in the mineral fiber board industry.
- Manufacturer's guidelines for Square Colors Mineral Fiber Boards.