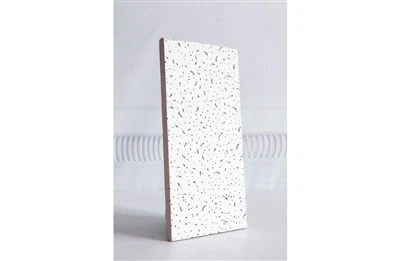
Hey there! As a supplier of white PVC gypsum board, I've seen my fair share of cracked boards. It can be a real headache, but don't worry – I'm here to walk you through how to fix those cracks and get your white PVC gypsum board looking as good as new.
Understanding White PVC Gypsum Board
First off, let's talk a bit about what white PVC gypsum board is. It's a popular building material known for its durability, fire resistance, and smooth white finish. You can check out more about it here: PVC GYPSUM BOARD. We offer different thicknesses, like the White 7mm PVC Gypsum Board and White 8mm PVC Gypsum Board, which are great for various applications, from ceiling installations to wall partitions.
What Causes Cracks on White PVC Gypsum Board?
Before we jump into the fixing process, it's important to understand what causes those cracks in the first place. There are a few common culprits:
- Installation Issues: If the board wasn't installed properly, such as improper fastening or not leaving enough expansion space, it can lead to cracks over time.
- Moisture and Humidity: White PVC gypsum board is generally resistant to moisture, but excessive exposure to high humidity or water can cause the board to expand and contract, leading to cracks.
- Structural Movements: Buildings naturally shift and settle over time. These structural movements can put stress on the gypsum board, causing it to crack.
- Impact Damage: Accidental bumps or hits can also result in cracks on the surface of the board.
Tools and Materials You'll Need
To fix the cracks on your white PVC gypsum board, you'll need the following tools and materials:
- Putty Knife: A good-quality putty knife is essential for applying the joint compound.
- Sandpaper: You'll need sandpaper to smooth out the repaired area after the joint compound has dried.
- Joint Compound: This is used to fill in the cracks and create a smooth surface.
- Fiberglass Mesh Tape: The tape helps to reinforce the repair and prevent the crack from reappearing.
- Paint (Optional): If you want to match the repaired area with the surrounding board, you'll need some paint that matches the color of your white PVC gypsum board.
Step-by-Step Guide to Fixing Cracks
Now that you have everything you need, let's get started on fixing those cracks:
Step 1: Clean the Crack
Use a clean, dry cloth to remove any dust, dirt, or debris from the crack. Make sure the area is completely clean before you start applying the joint compound.
Step 2: Apply Fiberglass Mesh Tape
Cut a piece of fiberglass mesh tape that is slightly longer than the crack. Place the tape over the crack and press it firmly into place using the putty knife. Make sure the tape is centered over the crack and that there are no air bubbles or wrinkles.
Step 3: Apply the First Coat of Joint Compound
Using the putty knife, apply a thin layer of joint compound over the fiberglass mesh tape. Make sure to cover the tape completely and smooth out the surface of the joint compound. Try to apply the joint compound in a thin, even layer to avoid creating a thick, uneven repair.
Step 4: Let the Joint Compound Dry
Allow the first coat of joint compound to dry completely. This usually takes about 24 hours, but it may take longer depending on the humidity and temperature in your area.


Step 5: Sand the Repaired Area
Once the first coat of joint compound is dry, use sandpaper to smooth out the repaired area. Start with a coarse-grit sandpaper and then switch to a finer-grit sandpaper for a smoother finish. Be careful not to sand too hard, as this can damage the surrounding board.
Step 6: Apply the Second Coat of Joint Compound
After sanding the repaired area, apply a second coat of joint compound over the first coat. This second coat will help to fill in any remaining gaps and create a more seamless repair. Again, use the putty knife to apply the joint compound in a thin, even layer and smooth out the surface.
Step 7: Let the Second Coat Dry and Sand Again
Allow the second coat of joint compound to dry completely, and then sand the repaired area again using fine-grit sandpaper. This will help to create a smooth, even surface that blends in with the surrounding board.
Step 8: Paint the Repaired Area (Optional)
If you want to match the repaired area with the surrounding board, you can apply a coat of paint that matches the color of your white PVC gypsum board. Make sure to let the paint dry completely before using the area.
Tips for Preventing Future Cracks
Once you've fixed the cracks on your white PVC gypsum board, you'll want to take steps to prevent future cracks from occurring. Here are some tips:
- Proper Installation: Make sure to follow the manufacturer's instructions when installing the white PVC gypsum board. Use the correct fasteners and leave enough expansion space to allow for natural movement.
- Control Moisture and Humidity: Keep the humidity levels in your home or building within a reasonable range. Use a dehumidifier if necessary, especially in areas prone to high humidity, such as basements and bathrooms.
- Avoid Impact Damage: Be careful when moving furniture or other objects near the gypsum board to avoid accidental bumps or hits.
Conclusion
Fixing cracks on white PVC gypsum board isn't as difficult as it may seem. With the right tools, materials, and a little bit of patience, you can easily repair the cracks and get your board looking as good as new. If you're in the market for high-quality white PVC gypsum board, don't hesitate to reach out for a purchase negotiation. We're here to provide you with the best products and services to meet your needs.
References
- "DIY Gypsum Board Repair Guide," Home Improvement Magazine
- "White PVC Gypsum Board: Properties and Applications," Building Materials Journal