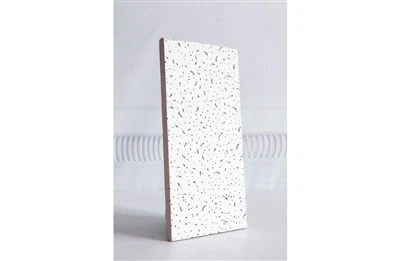
Installing colorful PVC gypsum board on a plasterboard wall can transform the look of any room, adding a vibrant and modern touch. As a supplier of high - quality colorful PVC gypsum boards, I'm excited to share with you a comprehensive guide on how to install these boards effectively.
1. Preparation
Before you start the installation process, it's crucial to gather all the necessary tools and materials. You'll need a measuring tape, a utility knife, a straightedge, a drill, screws, a caulking gun, and, of course, the colorful PVC gypsum boards. We offer a variety of options, including Colorful 8mm PVC Gypsum Board and Colorful 7.5mm PVC Gypsum Board, which are known for their durability and aesthetic appeal.
First, measure the wall accurately. Use a measuring tape to determine the length and height of the area where you'll be installing the boards. Make sure to account for any windows, doors, or other obstacles. Mark the measurements on the wall using a pencil and a straightedge.
Inspect the plasterboard wall for any damage or unevenness. If there are holes or cracks, fill them with spackle and sand the area smooth once it's dry. This will ensure a flat surface for the PVC gypsum boards to adhere to.
2. Cutting the Boards
Once you have the measurements, it's time to cut the colorful PVC gypsum boards to size. Place the board on a stable surface, such as a workbench. Use a straightedge to guide your utility knife and score the board along the cutting line. Make several passes with the knife to ensure a deep cut. Then, snap the board along the scored line.
For more complex cuts, such as around electrical outlets or pipes, you can use a jigsaw. Mark the cutting area on the board and carefully cut along the line using the jigsaw. Sand the edges of the cut boards to smooth any rough edges.
3. Installing the Boards
Start by installing the first board at the bottom of the wall. Apply construction adhesive to the back of the board using a caulking gun. Spread the adhesive evenly in a zig - zag pattern, leaving some space around the edges. Press the board firmly against the plasterboard wall, aligning it with the marked measurements.
Use a drill to insert screws through the board and into the wall. Place the screws about 6 - 8 inches apart along the edges and in the middle of the board. Make sure the screws are flush with the surface of the board.
Continue installing the remaining boards in the same manner, working your way up the wall. When installing adjacent boards, leave a small gap of about 1/8 inch between them to allow for expansion and contraction. You can use spacers to ensure consistent spacing.
4. Finishing Touches
After all the boards are installed, fill the gaps between the boards with caulk. Use a caulking gun to apply the caulk evenly along the joints. Smooth the caulk with a putty knife or your finger for a clean finish.
If you're using Embossed Pvc Film To Pvc Laminated Gypsum Ceiling Tile, you can add an extra layer of visual interest to your wall. These tiles come in various patterns and textures, which can enhance the overall aesthetic of the room.


5. Maintenance
Colorful PVC gypsum boards are relatively easy to maintain. You can clean them with a mild detergent and a soft cloth. Avoid using abrasive cleaners or scrubbers, as they can damage the surface of the boards.
Regularly inspect the boards for any signs of damage, such as cracks or loose screws. If you notice any issues, repair them promptly to prevent further damage.
Conclusion
Installing colorful PVC gypsum board on a plasterboard wall is a rewarding DIY project that can significantly enhance the appearance of your space. With the right tools, materials, and a little patience, you can achieve a professional - looking result.
As a supplier of high - quality colorful PVC gypsum boards, we're committed to providing you with the best products and support. If you're interested in purchasing our boards or have any questions about the installation process, we encourage you to contact us for a procurement discussion. We'll be happy to assist you in finding the perfect solution for your project.
References
- "Building Materials Handbook"
- "DIY Home Improvement Guide"