Hey there! I'm a supplier of sand mineral fiber ceiling products, and I'm here to share with you how to install a sand mineral fiber ceiling in a room with a sloping roof. It might seem a bit tricky at first, but with the right steps and some patience, you can achieve a great-looking ceiling that enhances the overall aesthetic of your space.


Understanding Sand Mineral Fiber Ceiling
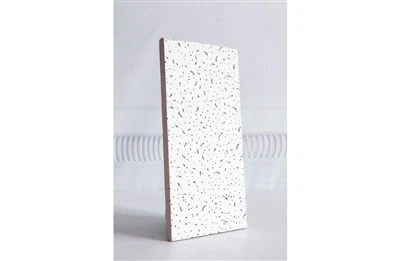
First off, let's talk a bit about sand mineral fiber ceiling. It's a popular choice for many homeowners and contractors because of its durability, acoustic properties, and fire resistance. The sand mineral fiber boards come in various designs and textures, allowing you to choose the one that best suits your style and the room's decor. For instance, you can check out our Square Sand Hole Mineral Fiber Board which has a unique look that can add a modern touch to your ceiling.
Tools and Materials You'll Need
Before you start the installation process, make sure you have all the necessary tools and materials. Here's a list to get you started:
- Tools:
- Measuring tape
- Utility knife
- Saw (if you need to cut the boards)
- Screwdriver
- Drill
- Level
- Staple gun
- Safety goggles and gloves
- Materials:
- Mineral Fiber Board or Mineral Fiber Ceiling Boards & Tiles
- Ceiling grid system (rails, clips, etc.)
- Screws or nails
- Adhesive (optional)
- Insulation (if required)
Preparing the Room
The first step is to prepare the room. Clear out any furniture or items from the area where you'll be working. This will give you plenty of space to move around and prevent any damage to your belongings. Next, measure the dimensions of the room, especially the sloping roof. You need to know the length, width, and the angle of the slope to ensure you cut the boards accurately.
Installing the Ceiling Grid
The ceiling grid is the framework that holds the mineral fiber boards in place. Start by installing the main runners along the walls. Use a level to make sure they are straight and properly aligned. Then, attach the cross tees to the main runners at regular intervals. The spacing between the cross tees will depend on the size of the mineral fiber boards you're using.
For a sloping roof, you might need to adjust the grid accordingly. You can use adjustable brackets or custom-cut the runners to fit the angle of the slope. Make sure the grid is securely fastened to the walls and ceiling to provide a stable base for the boards.
Cutting the Mineral Fiber Boards
Once the grid is in place, it's time to cut the mineral fiber boards to fit the space. Measure the area between the grid and mark the boards accordingly. Use a saw or a utility knife to make the cuts. Be careful when handling the boards as they can be brittle. Wear safety goggles and gloves to protect yourself from any dust or debris.
If the slope is significant, you might need to cut the boards at an angle. You can use a miter saw or a jig to make precise angled cuts. Take your time and double-check your measurements to ensure a perfect fit.
Installing the Mineral Fiber Boards
Now comes the fun part - installing the boards! Start at one corner of the room and place the first board into the grid. Make sure it fits snugly between the cross tees. If necessary, use adhesive to secure the board in place. You can also use screws or nails to fasten the boards to the grid.
Continue installing the boards row by row, working your way across the room. Make sure each board is properly aligned and level with the others. If you encounter any gaps or uneven edges, you can use filler or trim to cover them up.
Finishing Touches
Once all the boards are installed, you can add some finishing touches to give your ceiling a polished look. You can paint the boards to match the room's color scheme or leave them as they are for a natural look. You can also install molding or trim around the perimeter of the ceiling to add a decorative touch.
Maintenance and Care
After installing the sand mineral fiber ceiling, it's important to take proper care of it to ensure its longevity. Regularly dust the ceiling to prevent the buildup of dirt and debris. You can use a soft brush or a vacuum cleaner with a brush attachment to clean the boards.
If you notice any damage or stains on the boards, you can spot clean them using a mild detergent and water. Avoid using abrasive cleaners or harsh chemicals as they can damage the surface of the boards.
Conclusion
Installing a sand mineral fiber ceiling in a room with a sloping roof might seem like a challenging task, but with the right tools, materials, and a bit of know-how, you can do it yourself. By following these steps, you can create a beautiful and functional ceiling that enhances the look and feel of your space.
If you're interested in purchasing sand mineral fiber ceiling products for your project, we'd love to hear from you. We offer a wide range of high-quality Mineral Fiber Board and Mineral Fiber Ceiling Boards & Tiles that are suitable for various applications. Contact us today to discuss your requirements and get a quote.
References
- "Ceiling Installation Guide" - General construction handbook
- "Mineral Fiber Ceiling Products Manual" - Manufacturer's guide