Are there any special installation techniques for curved surfaces using Square Pinhole Mineral Fiber Board?


As a supplier of Square Pinhole Mineral Fiber Board, I often receive inquiries from customers about the installation of our products, especially when it comes to curved surfaces. In this blog post, I will share some insights and special installation techniques for using Square Pinhole Mineral Fiber Board on curved surfaces.
Understanding Square Pinhole Mineral Fiber Board
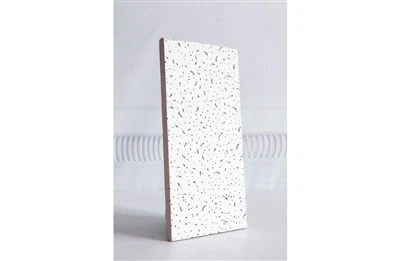
Before delving into the installation techniques, let's first understand what Square Pinhole Mineral Fiber Board is. Square Pinhole Mineral Fiber Board is a high - quality building material made from mineral fibers. It offers excellent acoustic performance, fire resistance, and durability. Our product comes in various forms, such as Mineral Fiber Board, Square Colors Mineral Fiber Board, and Square Sand Mineral Fiber Board, each with its unique aesthetic and functional properties.
Challenges of Installing on Curved Surfaces
Installing Square Pinhole Mineral Fiber Board on curved surfaces presents several challenges compared to flat surfaces. One of the main issues is the flexibility of the board. Mineral fiber boards are typically rigid, and bending them to fit a curve without causing damage can be difficult. Additionally, ensuring a seamless and secure fit on a curved surface requires precise cutting and fastening techniques.
Special Installation Techniques
Pre - shaping the Board
One of the key techniques for installing Square Pinhole Mineral Fiber Board on curved surfaces is pre - shaping the board. This can be done by carefully scoring the back of the board at regular intervals. The scoring should be deep enough to allow the board to bend but not so deep that it compromises the structural integrity of the board. After scoring, gently bend the board to match the curvature of the surface. It is important to do this slowly and carefully to avoid cracking or breaking the board.
Using Flexible Adhesives
In addition to mechanical fasteners, using flexible adhesives can greatly assist in the installation of the board on curved surfaces. Flexible adhesives can help to hold the board in place while allowing for some movement as the board conforms to the curve. Apply the adhesive evenly on the back of the board and on the curved surface. Make sure to follow the manufacturer's instructions regarding the application and drying time of the adhesive.
Custom - cutting the Board
Curved surfaces often require custom - cutting of the Square Pinhole Mineral Fiber Board. Measure the curve accurately and transfer the measurements to the board. Use a sharp utility knife or a jigsaw to cut the board to the desired shape. When cutting, make sure to cut on a flat and stable surface to ensure a clean and precise cut.
Support Structures
For larger or more complex curved surfaces, it may be necessary to install support structures. These structures can provide additional stability and help to hold the board in place. Support structures can be made from wood, metal, or other suitable materials. Install the support structures along the curve before attaching the board.
Step - by - Step Installation Guide
- Surface Preparation: Clean the curved surface thoroughly to remove any dirt, dust, or debris. Make sure the surface is dry and smooth.
- Measure and Mark: Measure the curve accurately and mark the dimensions on the Square Pinhole Mineral Fiber Board.
- Pre - shape the Board: Score the back of the board at regular intervals and gently bend it to match the curve.
- Apply Adhesive: Apply a flexible adhesive evenly on the back of the board and on the curved surface.
- Attach the Board: Carefully place the pre - shaped board on the curved surface. Press the board firmly against the surface to ensure good adhesion.
- Fasten the Board: Use mechanical fasteners, such as nails or screws, to secure the board in place. Make sure the fasteners are evenly spaced and do not damage the board.
- Finishing Touches: Trim any excess board material and fill any gaps or seams with a suitable filler. Sand the surface smooth for a professional finish.
Quality Control
During the installation process, it is important to conduct regular quality control checks. Inspect the board for any signs of damage, such as cracks or chips. Make sure the board is securely attached and that the fit is seamless. If any issues are detected, address them immediately to ensure a high - quality installation.
Conclusion
Installing Square Pinhole Mineral Fiber Board on curved surfaces requires special techniques and careful planning. By pre - shaping the board, using flexible adhesives, custom - cutting, and installing support structures, it is possible to achieve a successful installation on curved surfaces. Our Square Pinhole Mineral Fiber Board offers a great solution for both flat and curved surfaces, providing excellent acoustic and aesthetic properties.
If you are interested in purchasing our Square Pinhole Mineral Fiber Board or have any questions about the installation process, please feel free to contact us for a detailed discussion. We are committed to providing high - quality products and professional installation advice to meet your needs.
References
- Building Materials Handbook: A comprehensive guide to various building materials and their installation techniques.
- Mineral Fiber Board Manufacturer's Manual: Provides detailed information about the properties and installation of Square Pinhole Mineral Fiber Board.