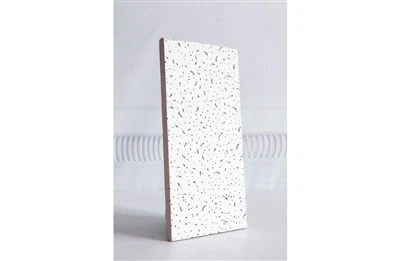
Installing a ceiling T grid over an existing ceiling can be a practical and cost - effective way to enhance the aesthetics and functionality of a space. As a ceiling T grid supplier, I'm here to guide you through the entire process, from understanding the materials to the final installation steps.
Understanding Ceiling T Grids
Before you start the installation, it's essential to have a clear understanding of what ceiling T grids are. CEILING T GRID is a framework system used to support ceiling tiles. It consists of a series of T - shaped metal or plastic bars that interlock to form a grid pattern. These grids come in different types, such as Flat T Grid and SUSPENDED CEILING GRID, each with its own unique features and applications.
Flat T Grid is a popular choice for many installations. It has a sleek and modern appearance, making it suitable for both commercial and residential settings. The flat design allows for a seamless look when ceiling tiles are installed, creating a clean and professional finish. You can learn more about Flat T Grid by visiting Flat T Grid.
SUSPENDED CEILING GRID, on the other hand, is designed to be hung from the ceiling structure. This type of grid provides flexibility in terms of height adjustment and can be used to conceal wiring, pipes, and other utilities. It's commonly used in commercial buildings, offices, and basements. To explore more about SUSPENDED CEILING GRID, click on SUSPENDED CEILING GRID.


Tools and Materials You'll Need
- Tools:
- Measuring tape
- Level
- Drill
- Screwdriver
- Tin snips
- Pliers
- Safety goggles
- Gloves
- Materials:
- Ceiling T grid components (main tees, cross tees, wall angles)
- Ceiling tiles
- Hangers (if using a suspended ceiling grid)
- Screws
- Anchors
Step - by - Step Installation Process
Step 1: Measure and Plan
The first step is to measure the area of the existing ceiling. Use a measuring tape to determine the length and width of the room. This will help you calculate the amount of ceiling T grid and ceiling tiles you need. Make sure to account for any irregularities or obstacles in the room, such as vents or light fixtures.
Once you have the measurements, create a layout plan on paper. Mark the position of the main tees, cross tees, and wall angles. This will serve as a guide during the installation process.
Step 2: Prepare the Existing Ceiling
Before installing the ceiling T grid, you need to prepare the existing ceiling. Remove any loose debris, dust, or old ceiling tiles. If there are any damaged areas on the ceiling, repair them before proceeding.
If you're using a suspended ceiling grid, you'll need to install hangers. Mark the locations of the hangers on the ceiling joists or structure according to your layout plan. Drill holes and insert anchors if necessary. Then, attach the hangers to the ceiling using screws.
Step 3: Install Wall Angles
Wall angles are the first components of the ceiling T grid to be installed. They are used to provide a support edge for the grid and ceiling tiles. Measure and cut the wall angles to fit the perimeter of the room using tin snips.
Use a level to ensure that the wall angles are straight and level. Attach the wall angles to the walls using screws or nails. Make sure the wall angles are firmly attached and flush with the walls.
Step 4: Install Main Tees
Main tees are the primary horizontal components of the ceiling T grid. They run parallel to the long side of the room and are supported by the hangers (if using a suspended ceiling grid) or the wall angles.
Measure and cut the main tees to the appropriate length using tin snips. Insert the main tees into the slots on the wall angles or hangers. Connect the main tees together using connectors or clips. Make sure the main tees are level and evenly spaced according to your layout plan.
Step 5: Install Cross Tees
Cross tees are the secondary horizontal components of the ceiling T grid. They run perpendicular to the main tees and divide the grid into smaller sections.
Measure and cut the cross tees to the appropriate length using tin snips. Insert the cross tees into the slots on the main tees. Connect the cross tees to the main tees using connectors or clips. Make sure the cross tees are level and evenly spaced.
Step 6: Check for Level and Alignment
Once all the main tees and cross tees are installed, use a level to check for level and alignment. Adjust the position of the grid components if necessary. Make sure the grid is flat and even across the entire room.
Step 7: Install Ceiling Tiles
After the ceiling T grid is installed and checked for level and alignment, it's time to install the ceiling tiles. Start from one corner of the room and work your way across. Place the ceiling tiles into the grid, making sure they fit snugly.
If you need to cut the ceiling tiles to fit around obstacles or in the corners, use a utility knife or tin snips. Be careful when cutting the tiles to ensure a clean and accurate cut.
Step 8: Final Inspection
Once all the ceiling tiles are installed, conduct a final inspection of the installation. Check for any loose or uneven tiles, gaps in the grid, or other issues. Make any necessary adjustments or repairs.
Tips and Tricks
- Use a Laser Level: A laser level can make it easier to ensure that the ceiling T grid is level and aligned. It projects a straight line on the walls and ceiling, providing a visual guide during the installation process.
- Label the Components: As you cut and prepare the ceiling T grid components, label them according to their position in the grid. This will make it easier to install them correctly and save time.
- Work in Sections: Instead of trying to install the entire ceiling T grid at once, work in sections. This will make the installation process more manageable and help you maintain accuracy.
Conclusion
Installing a ceiling T grid over an existing ceiling is a relatively straightforward process that can transform the look and functionality of a space. By following the steps outlined in this guide and using the right tools and materials, you can achieve a professional - looking installation.
If you're interested in purchasing high - quality ceiling T grid and ceiling tiles, we're here to help. As a leading ceiling T grid supplier, we offer a wide range of products to meet your needs. Contact us for more information and to discuss your procurement requirements. We look forward to working with you to create the perfect ceiling solution for your project.
References
- Building Construction Handbook, various editions
- Ceiling Installation Guides from industry manufacturers