Hey there! As a supplier of sand mineral fiber ceiling, I've got tons of experience with these products. Today, I'm gonna walk you through the process of installing sand mineral fiber ceiling on a sloped ceiling. It might seem a bit tricky at first, but with the right steps and a little patience, you'll have a beautiful ceiling in no time.


What You'll Need
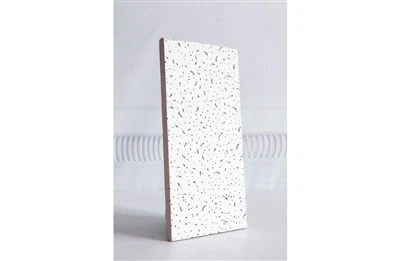
First things first, let's talk about the tools and materials you'll need for this project. You'll obviously need the sand mineral fiber ceiling panels. We offer a great range of Mineral Fiber Tiles that are perfect for this kind of job. They're durable, sound - absorbing, and look really sleek.
In addition to the ceiling panels, you'll need a measuring tape. This is crucial for getting the right dimensions of your sloped ceiling. A utility knife will come in handy for cutting the panels to fit. You'll also need a staple gun or a nail gun, along with the appropriate staples or nails. A level is essential to make sure your installation is straight, even on a sloped surface. And don't forget safety gear like gloves and safety glasses.
Measuring the Sloped Ceiling
The first step in the installation process is to measure your sloped ceiling accurately. Start by measuring the length and width of the ceiling at multiple points. Since it's sloped, the measurements will vary. Take measurements at the top, middle, and bottom of the slope. This will give you a good idea of the shape and size of the area you need to cover.
Once you have these measurements, transfer them onto the sand mineral fiber ceiling panels. Mark where you'll need to make cuts. It's a good idea to make a template out of cardboard first, just to double - check your measurements before cutting into the actual panels. This can save you a lot of time and money if you make a mistake.
Cutting the Panels
Cutting the sand mineral fiber ceiling panels is a bit different from cutting regular flat panels. You'll want to use a sharp utility knife. Score the panel along the marked line several times to make a deep cut. Then, gently break the panel along the scored line. If you need to make curved cuts, you can use a jigsaw, but be extra careful as the panels can be a bit brittle.
When cutting the panels for a sloped ceiling, make sure to account for the angle. You might need to cut the panels at an angle to fit properly against the slope. This is where your measurements come in really handy. Take your time with this step, as a well - cut panel will make the installation much easier.
Preparing the Ceiling Surface
Before you start installing the panels, you need to prepare the ceiling surface. Clean the surface thoroughly to remove any dust, dirt, or debris. If there are any bumps or uneven areas, you can use a sanding block to smooth them out. This will ensure that the panels adhere properly and look good once installed.
If your ceiling has any old ceiling tiles or fixtures, remove them carefully. You might need to patch any holes or cracks in the ceiling using spackle. Let the spackle dry completely before moving on to the next step.
Installing the Panels
Now it's time to start installing the panels. Begin at the highest point of the sloped ceiling. You can use a staple gun or a nail gun to attach the panels to the ceiling. Make sure to space the staples or nails evenly along the edges of the panel. For a more secure installation, you can also use construction adhesive in addition to the staples or nails.
As you work your way down the slope, make sure each panel fits snugly against the previous one. Use a level to check that the panels are straight, even though the ceiling is sloped. If you need to make any adjustments, do it before you fully secure the panel.
When you reach the edges of the ceiling, you might need to cut the panels to fit. This is where those accurate measurements come in handy again. Make sure the edges of the panels are flush with the wall or any other ceiling features.
Finishing Touches
Once all the panels are installed, you can add some finishing touches. You can use a putty knife to fill any gaps between the panels with joint compound. Let the joint compound dry, and then sand it smooth. This will give your ceiling a seamless look.
If you want to add some extra style, you can paint the sand mineral fiber ceiling. We also offer Square Pinhole Mineral Fiber Board and Mineral Fiber Ceiling in different colors and patterns, so you can choose the one that best suits your space.
Why Choose Our Sand Mineral Fiber Ceiling
Our sand mineral fiber ceiling products are top - notch. They're made from high - quality materials that are not only aesthetically pleasing but also functional. They offer great sound insulation, which is perfect for rooms where you want to reduce noise. They're also fire - resistant, adding an extra layer of safety to your space.
Plus, our team is always here to help. Whether you have questions about installation or need advice on which product is right for you, we've got your back.
Contact Us for Purchasing
If you're interested in purchasing our sand mineral fiber ceiling products for your sloped ceiling project or any other project, don't hesitate to reach out. We're happy to discuss your needs, provide you with a quote, and answer any questions you might have. We're committed to providing the best products and services to our customers.
References
- "Ceiling Installation Guide" - Home Improvement Handbook
- "Mineral Fiber Ceiling Products: Features and Benefits" - Building Materials Magazine